Woooahh! It's been a while! My apologies but as you can see, I've been busy.
First thing's first... I've been bookbinding! And It's great =D It's my new favourite craft.
To start you will need
Right! Here we go.
Start by making your signatures. I used presentation card, A4, and folded them in half.

I used 9 pages to make 3 sets of 3. 3 is a good number for your signatures, although you could use more depending on weight.
When you've put these into sets, meaning stacked and folded, you can make the holes.
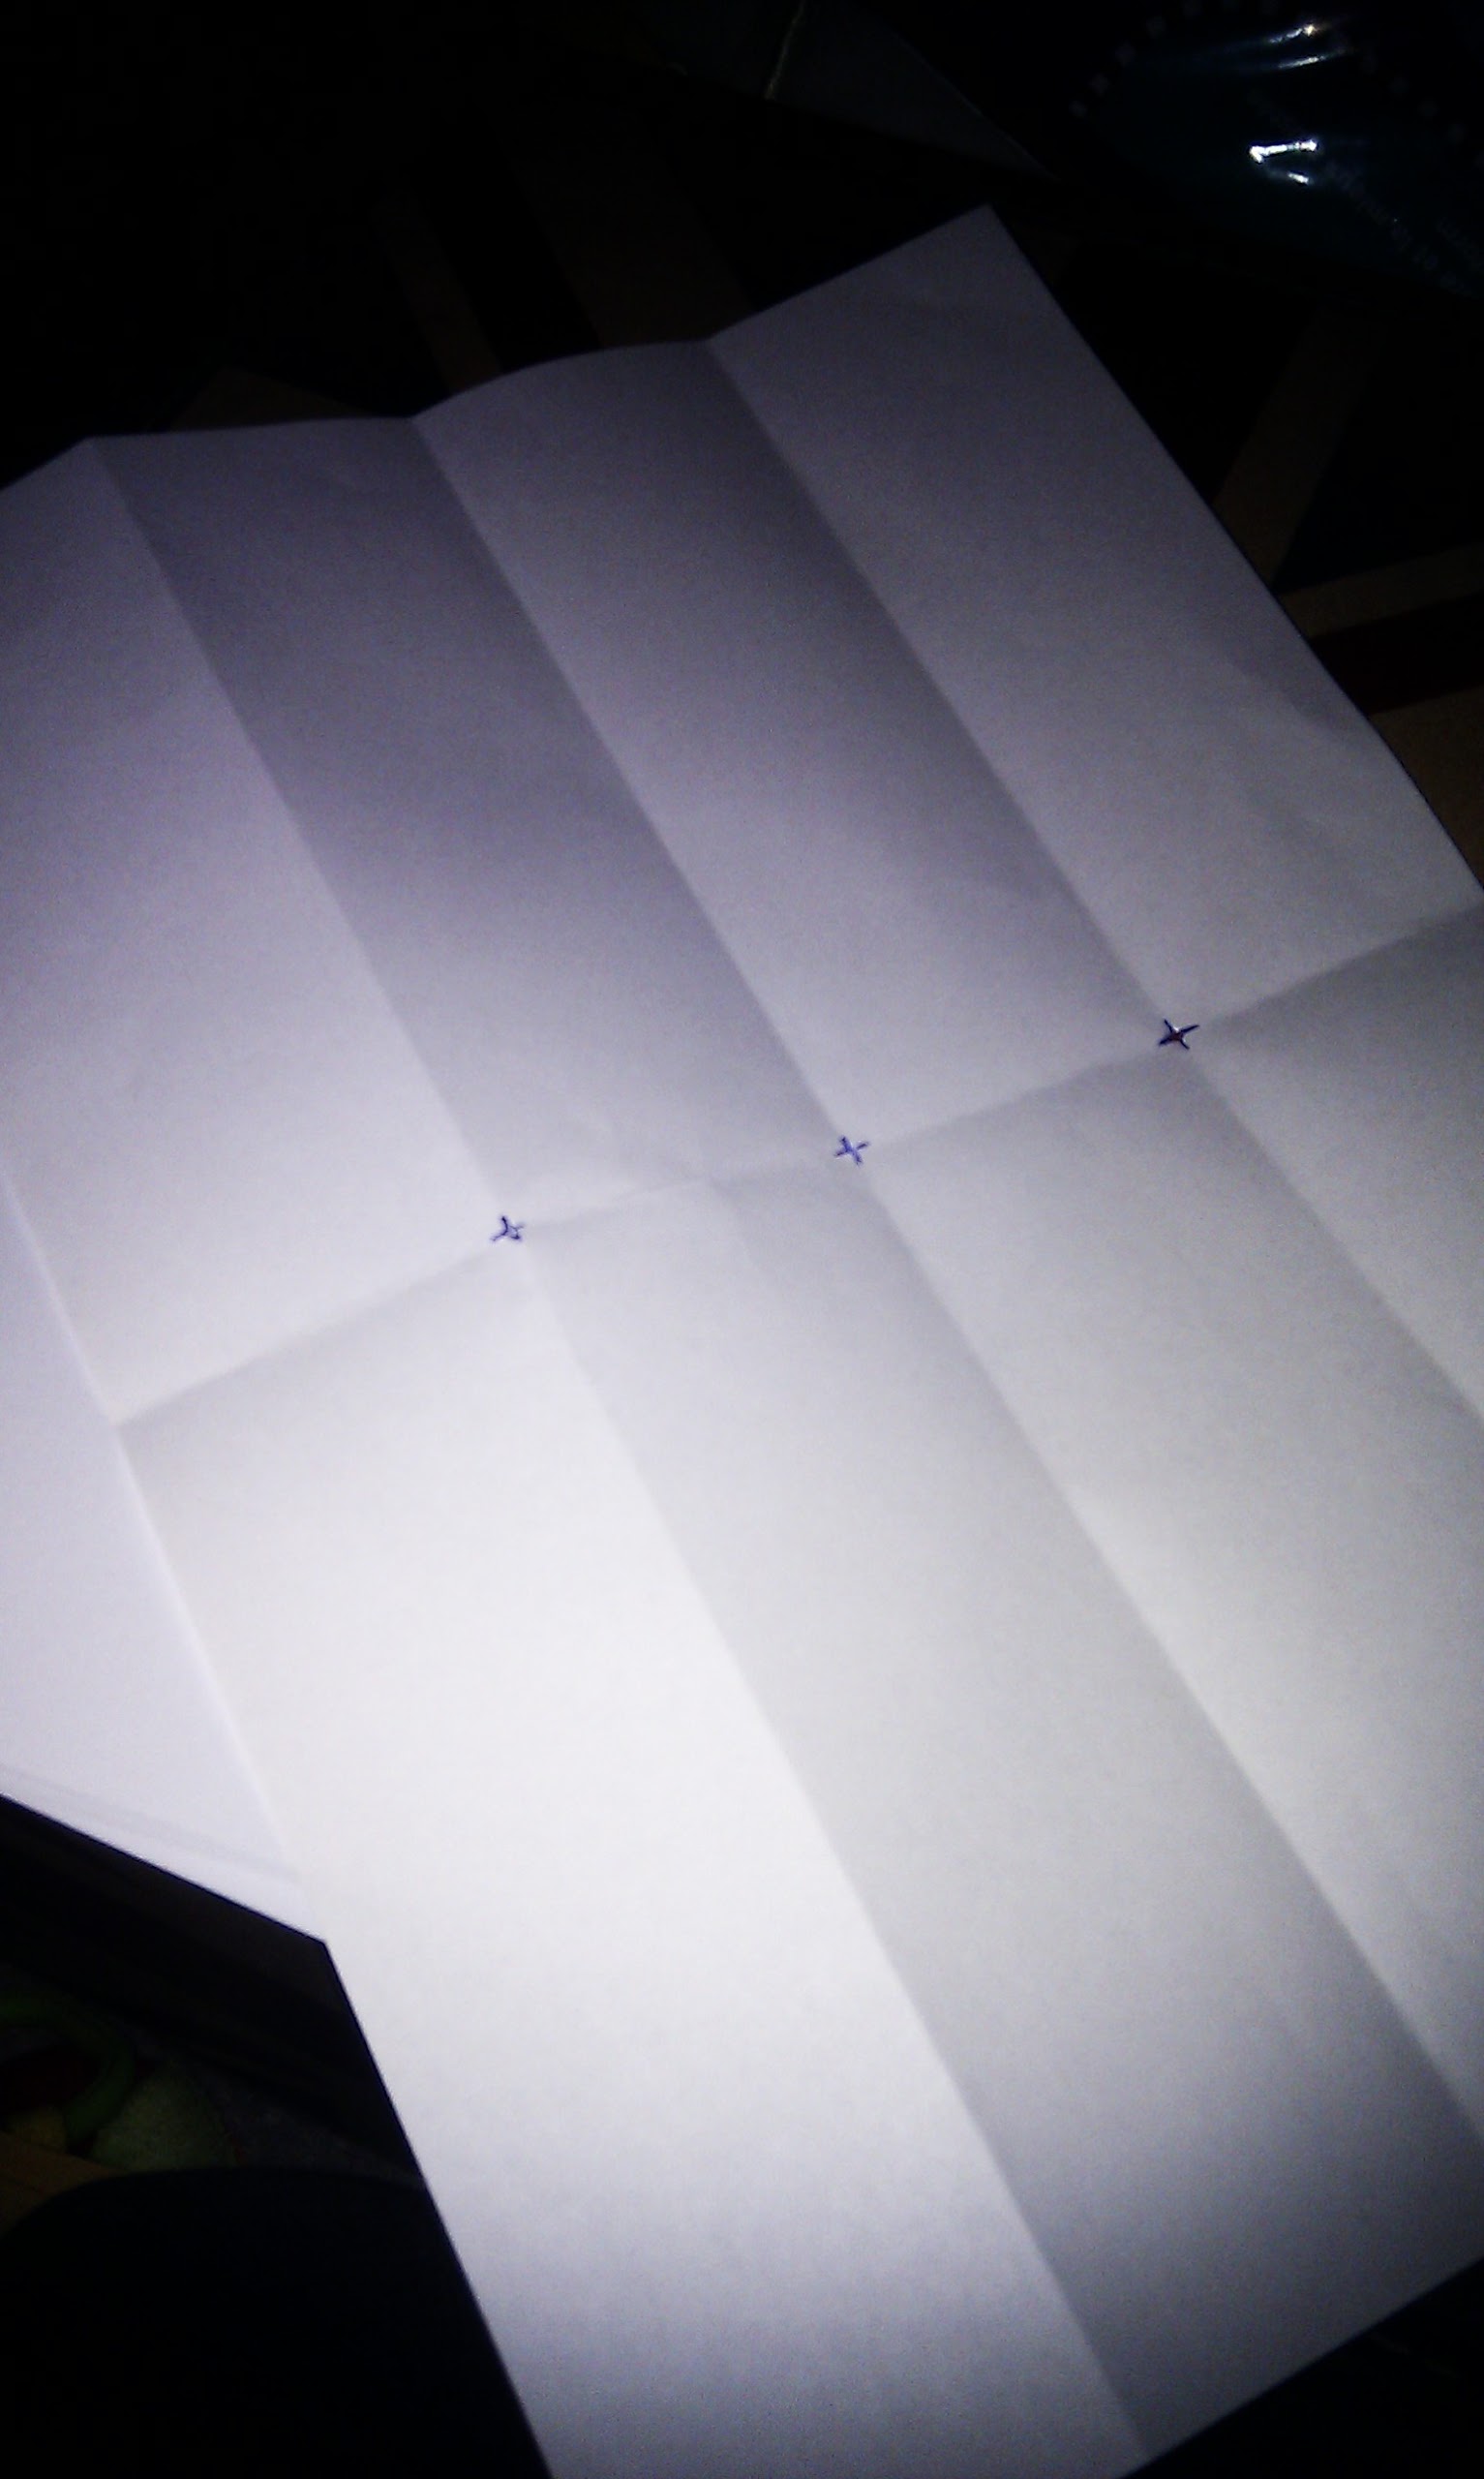
Use a scrap piece of paper to mark where your holes will be. They don't have to be evenly spaced but it does help later on if you can.

Now you can put the scrap inside your set, using your awl, punch your holes through the fold line.

Signature's done, Easy peasy!!
Now for the cover's. I used some blue card, A4. In future I will make my covers a few mm larger then my signatures, it helps keep your pages hidden inside.

I cut the card in half and used backing paper for the back, I also used some scrapbook paper for the spine edge, just for decorative purposes.

Using the scrap you can add holes to the spine, half a cm from the edge should do fine

Now for the binding. Here's where i let you down :-( My camera is pretty naff, so a picture tutorial will be useless, and without picture's i'll just confuse you. sooooo.... here's a tutorial with the method I used. Sorry!
Are you back? I hope so ;-) Here's my finished spine.

Then it's the fun part. Decorating!!
I made mine for my pop's on father's day, and here are a few pages.


And needless to say, my Dad loved it!!! Proper chuffed =D
Up next, Another Father's day goody. This time for my fella, It was his first father's Day so I had to make it a little personal. I used my pro markers and a plain baby vest to make his unique card.
Using an Iron to heat seal the ink (don't take my word for it) he also has a baby keepsake.


And last but not least.
Personalized photo necklace.
I'd seen these on pinterest and i think they would make beautiful handmade gifts.
I had a nosy on Google for some glass tiles and they are surprisingly cheap!
Bought some findings and cord from my local bead shop and the beautiful Angel, the most helpful shop assistant you could ask for!
Cut the photo slightly smaller then the tile, this gives it the perfect fit, no sticky out bits. as you can see, I cut mine a little too small, oops!
A bit of super glue and hey presto!!
I used only a dab on the back of the tile and placing the photo face down, moved it around a little to spread the glue to the edges. Using to much will cause the glue to seep from the edges, Messy!!
I also put backing paper behind the photo.

And that's it for now!
I've noticed that the vast majority of readers are crochet fans, so my next project will be along those lines. And i'll try not to leave it so long next time!!
Chow for now =D
First thing's first... I've been bookbinding! And It's great =D It's my new favourite craft.
To start you will need
- Paper (for signature and decoration)
- Card (for the covers)
- Embroidery thread or thick yarn
- Embroidery needle
- Awl or thick, sharp needle
- Glue (I just used a glue stick but adhesive spray is pretty effective)
- Decoration (I used buttons and ribbon from a cute local shop)
Right! Here we go.
Start by making your signatures. I used presentation card, A4, and folded them in half.

I used 9 pages to make 3 sets of 3. 3 is a good number for your signatures, although you could use more depending on weight.
When you've put these into sets, meaning stacked and folded, you can make the holes.
Use a scrap piece of paper to mark where your holes will be. They don't have to be evenly spaced but it does help later on if you can.
Now you can put the scrap inside your set, using your awl, punch your holes through the fold line.

Signature's done, Easy peasy!!
Now for the cover's. I used some blue card, A4. In future I will make my covers a few mm larger then my signatures, it helps keep your pages hidden inside.

I cut the card in half and used backing paper for the back, I also used some scrapbook paper for the spine edge, just for decorative purposes.

Using the scrap you can add holes to the spine, half a cm from the edge should do fine

Now for the binding. Here's where i let you down :-( My camera is pretty naff, so a picture tutorial will be useless, and without picture's i'll just confuse you. sooooo.... here's a tutorial with the method I used. Sorry!
Are you back? I hope so ;-) Here's my finished spine.

Then it's the fun part. Decorating!!
I made mine for my pop's on father's day, and here are a few pages.


And needless to say, my Dad loved it!!! Proper chuffed =D
Up next, Another Father's day goody. This time for my fella, It was his first father's Day so I had to make it a little personal. I used my pro markers and a plain baby vest to make his unique card.
Using an Iron to heat seal the ink (don't take my word for it) he also has a baby keepsake.


And last but not least.
Personalized photo necklace.
I'd seen these on pinterest and i think they would make beautiful handmade gifts.
I had a nosy on Google for some glass tiles and they are surprisingly cheap!
Bought some findings and cord from my local bead shop and the beautiful Angel, the most helpful shop assistant you could ask for!
Cut the photo slightly smaller then the tile, this gives it the perfect fit, no sticky out bits. as you can see, I cut mine a little too small, oops!
A bit of super glue and hey presto!!
I used only a dab on the back of the tile and placing the photo face down, moved it around a little to spread the glue to the edges. Using to much will cause the glue to seep from the edges, Messy!!
I also put backing paper behind the photo.

And that's it for now!
I've noticed that the vast majority of readers are crochet fans, so my next project will be along those lines. And i'll try not to leave it so long next time!!
Chow for now =D


